1.4. APMの設定
APMをプロビジョニングします。

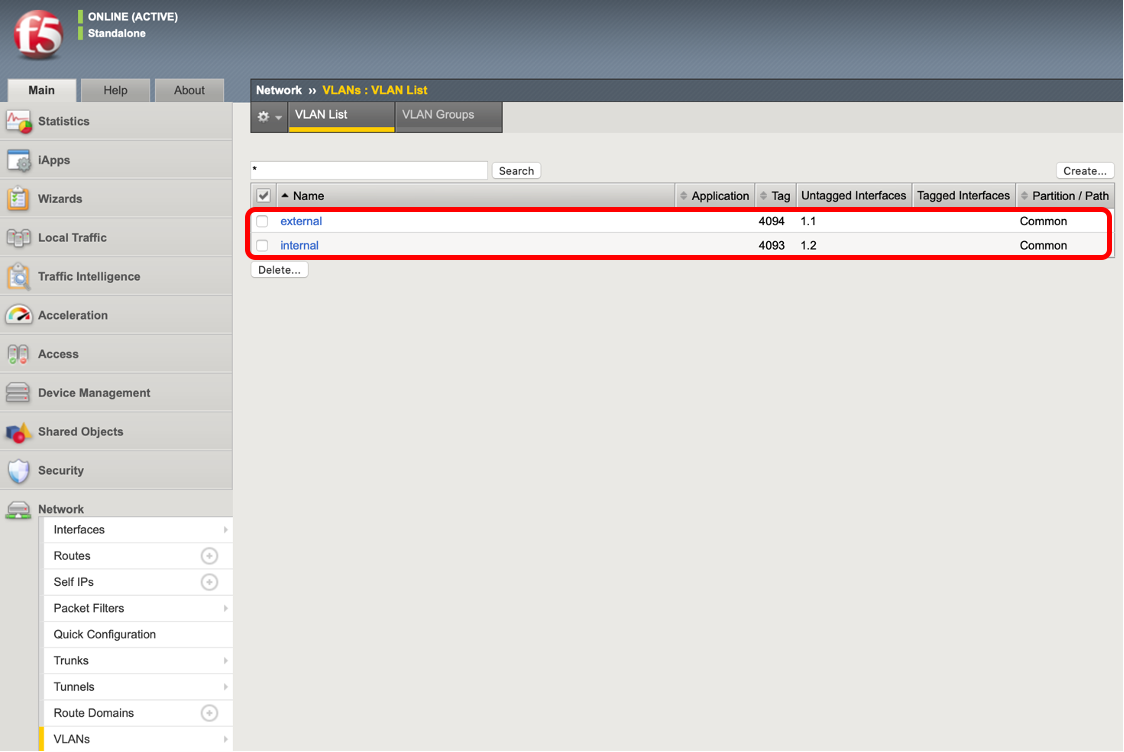
VLANの設定をします。(以下はシングル構成の場合のイメージ)
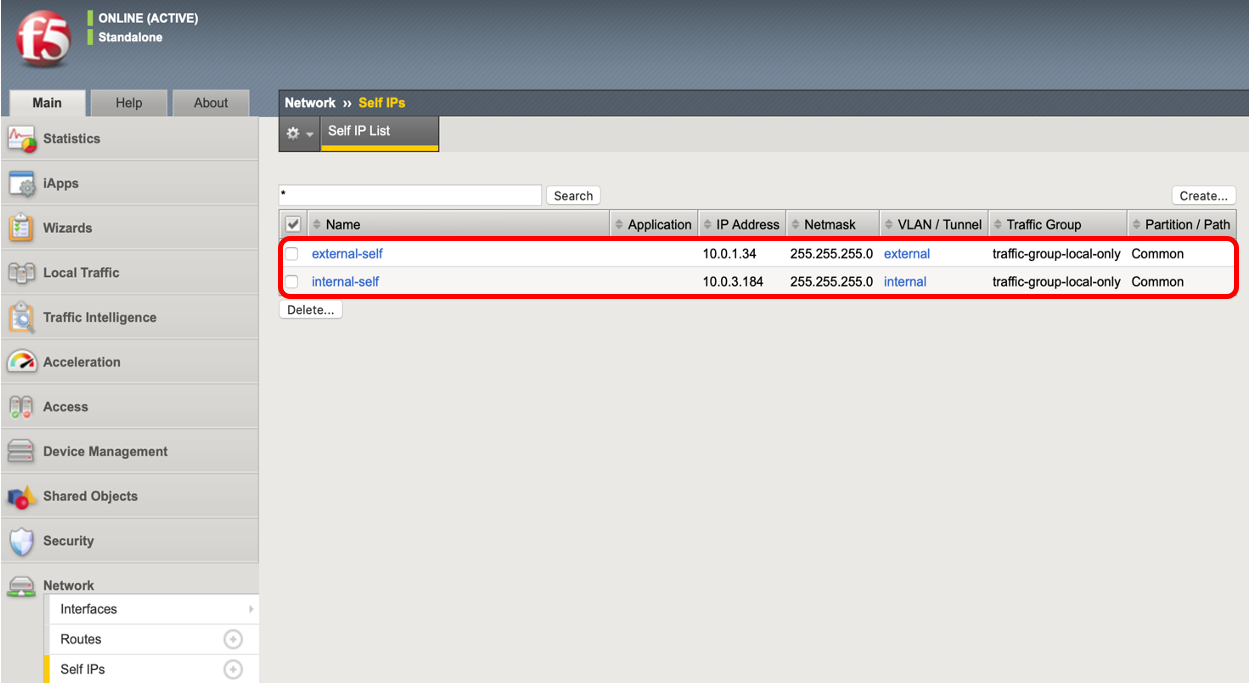
SelfIPの設定を行います。(以下はシングル構成の場合のイメージ)
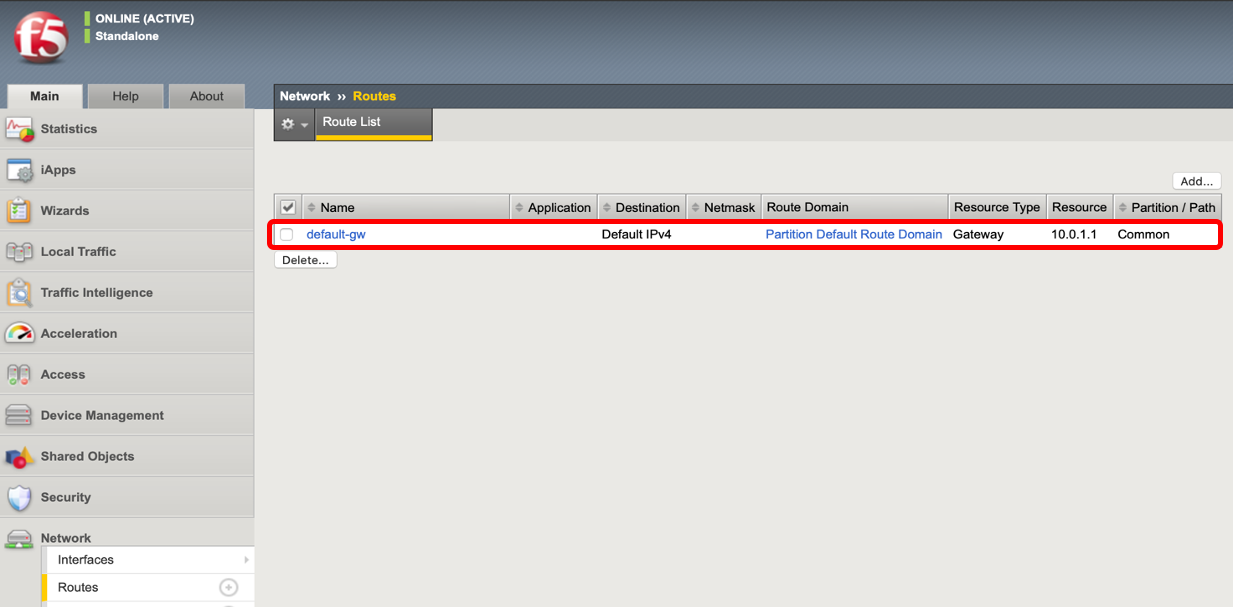
デフォルトゲートウェイを設定します。
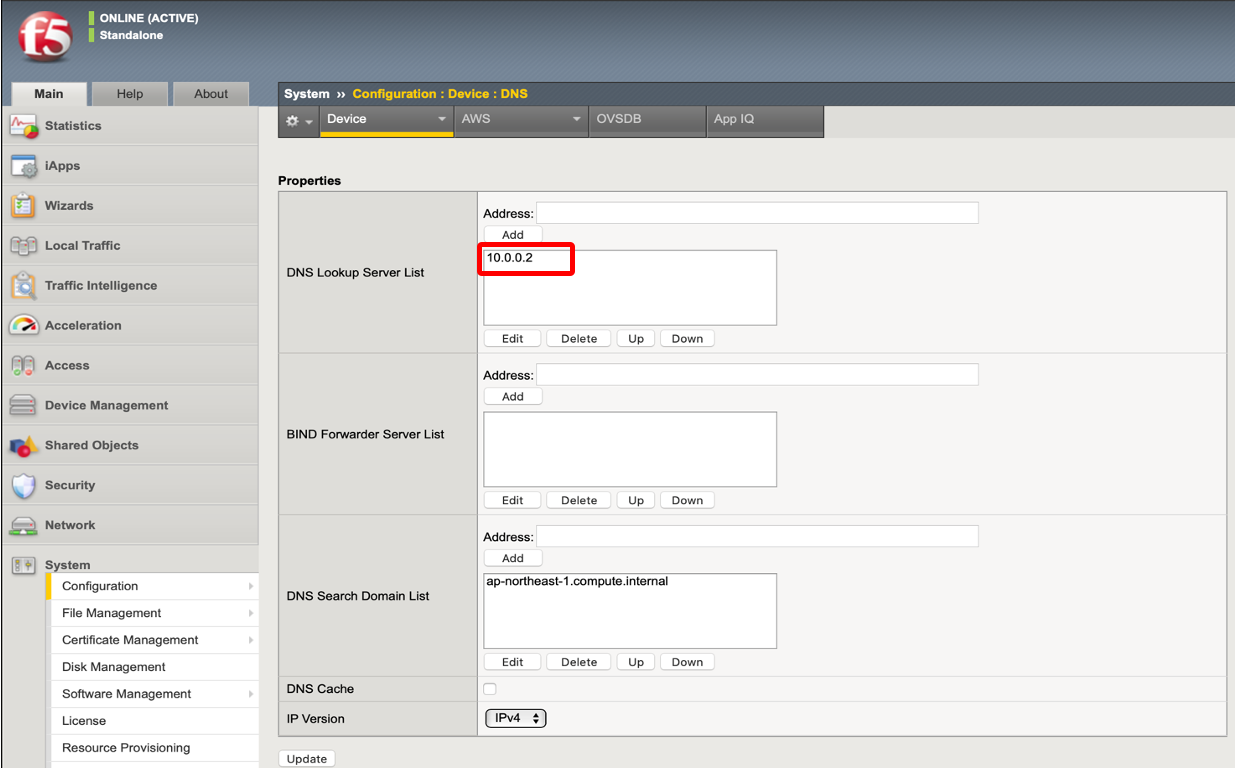
DNSの設定をします。
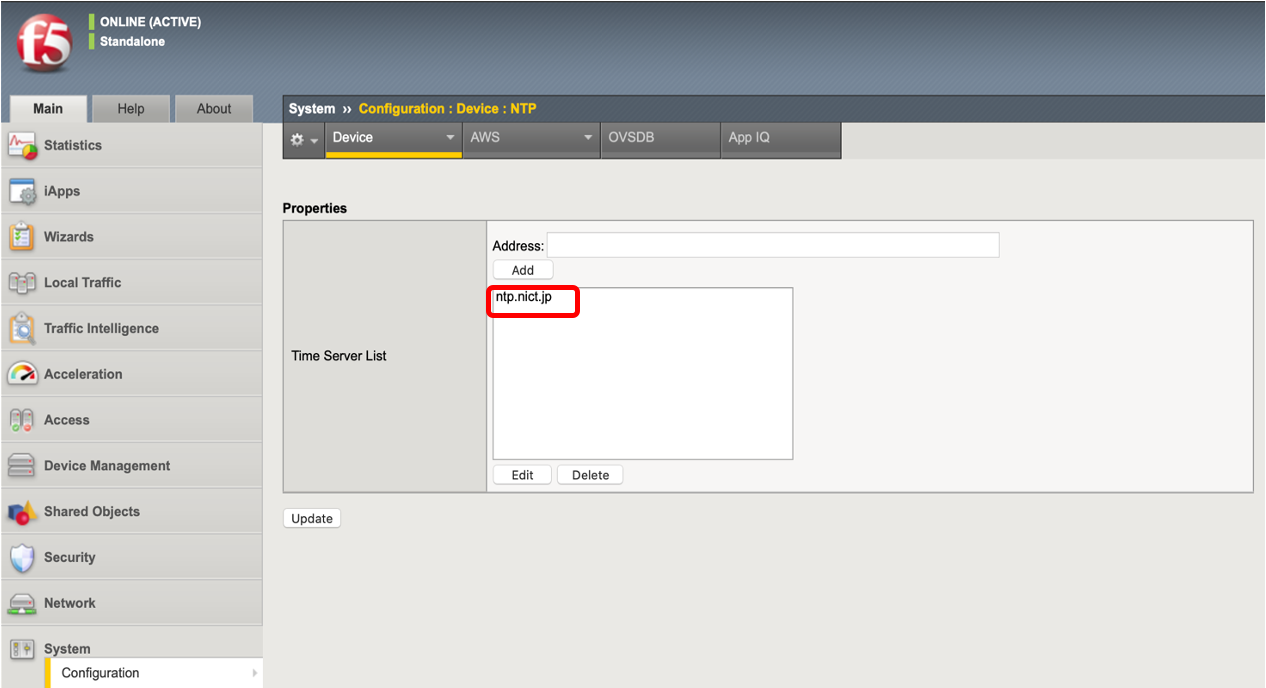
NTPの設定をします。
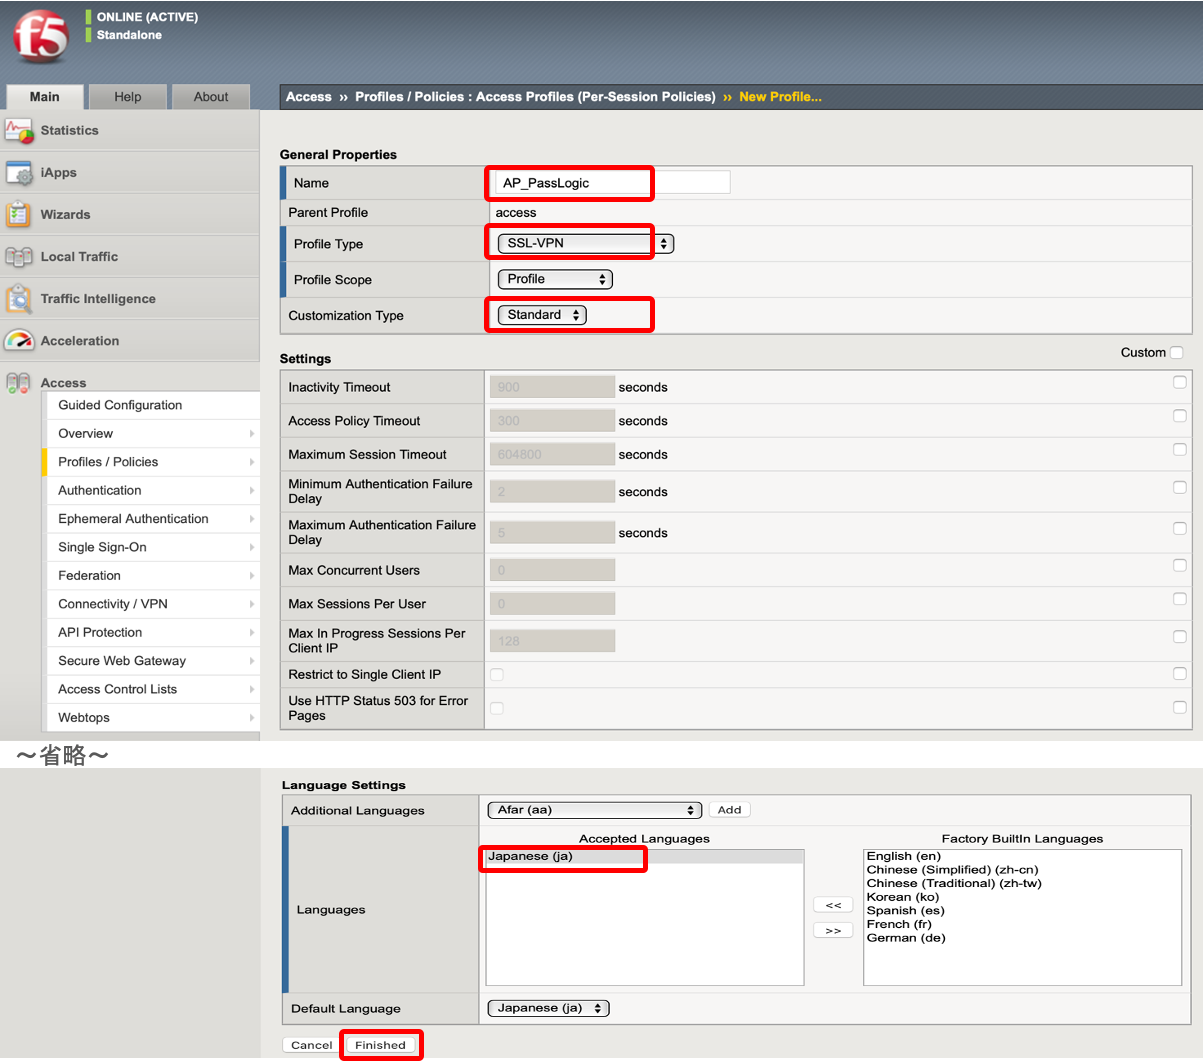
Access Profileを作成します。Access >> Profiles/Policies >> Access Profiles(Per-Session Policies) にて Create ボタンを押し、Access Profileを作成します。Name にて任意の名称を入力し、Profile Type にて、SSL-VPN を選択し、Customization Type にて Standard を選択し、Language にて Japanese を選択し、Finished ボタンを押します。
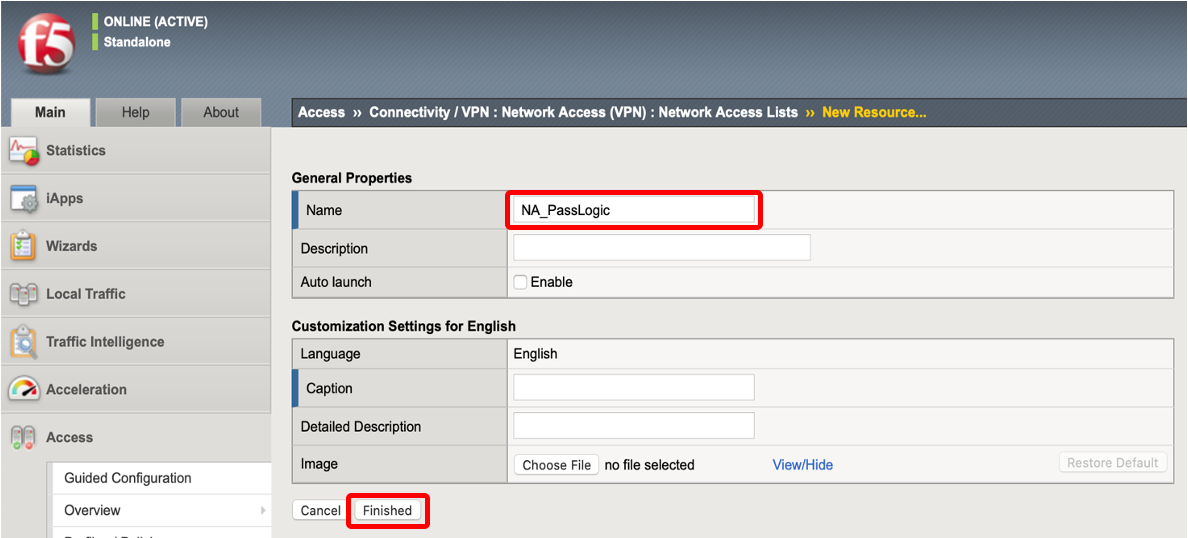
Network Access listを作成します。Access >> Connectivity/VPN >> Network Access(VPN) >> Network Access Lists にて、Create ボタンを押し、Name に任意の名称を入力し、Finished ボタンを押します。
作成したNetwork Access Listを選択します。

SSL-VPN接続後にクライアントに割り振りたいIPアドレス(Lease Pool)を設定します。Network Settings タブを選択し、IPV4 Lease Pool の右隣の + ボタンを押します。

Name に任意の名称、Member List にSSL-VPN接続後にクライアントに割り振りたいIPアドレスの範囲を指定し、Finished ボタンを押します。

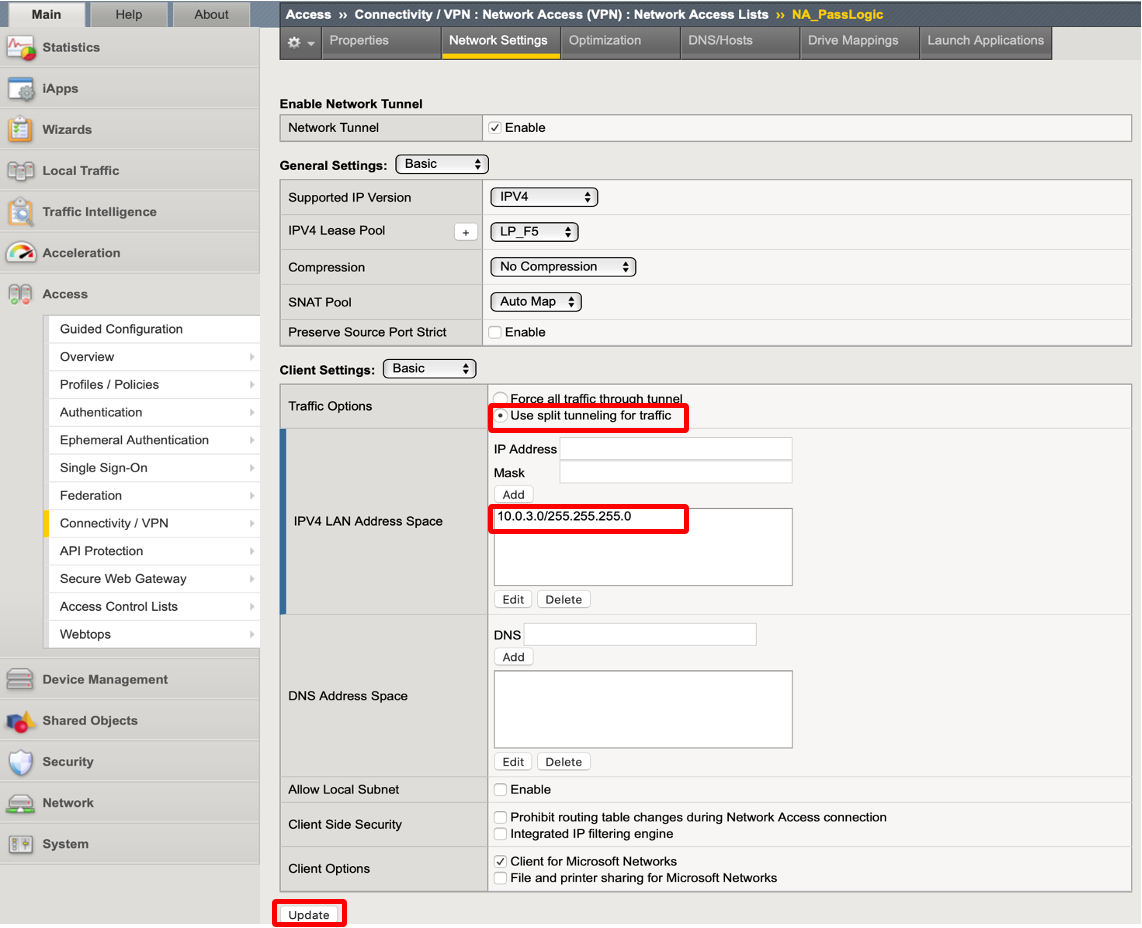
クライアントからSSL-VPN接続させたい接続先IPアドレスの範囲(Split tunneling)を設定します。(全てSSL-VPN経由で接続させたい場合は、本設定は不要です。) Traffic Options にて、Use split tunneling for traffic を選択し、IPV4 LAN Address Space にて、IPアドレス範囲を指定し、Update ボタンを押します。
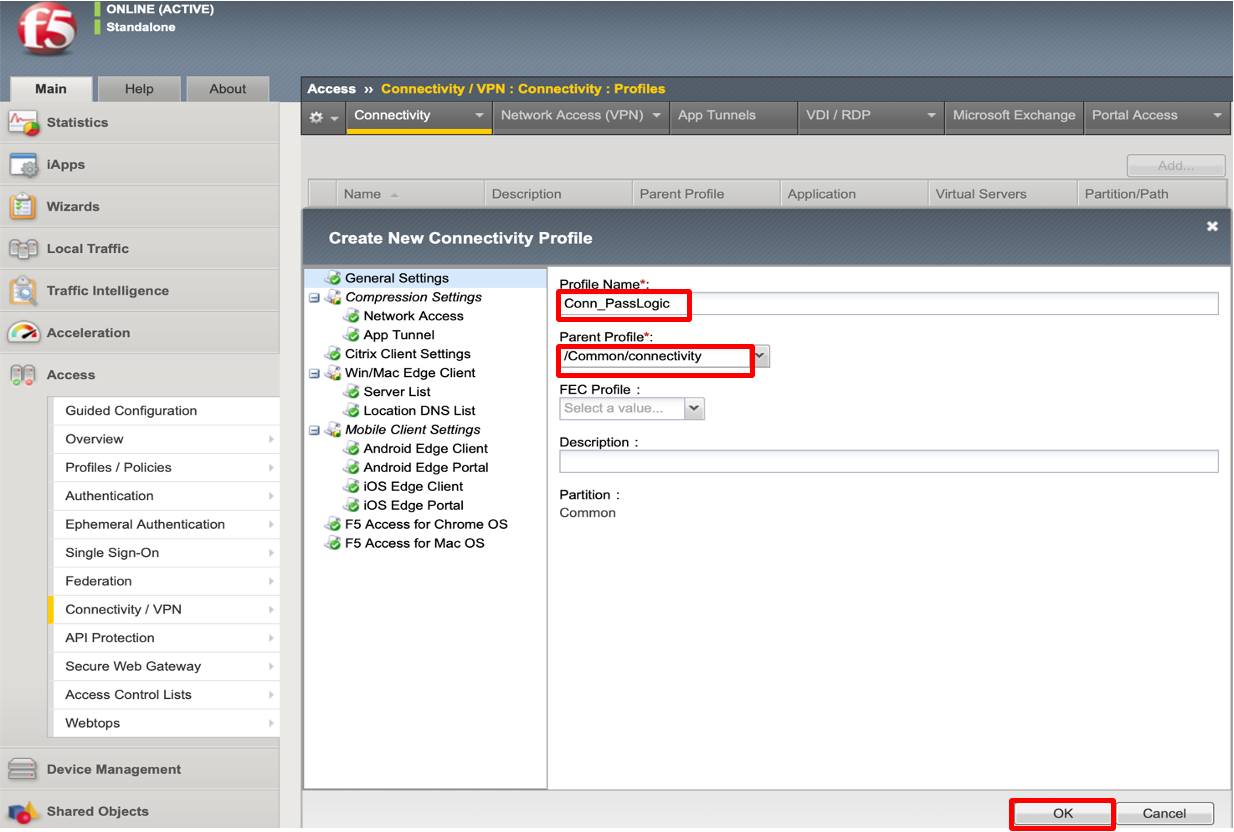
Connectivityプロファイルを作成します。Access >> Connectivity/VPN >> Connectivity >> Profiles にて、Add ボタンを押します。Profile Name にて、任意の名称を入力し、Parent Profile にて、/Common/connectivity を選択し、OK ボタンを押します。
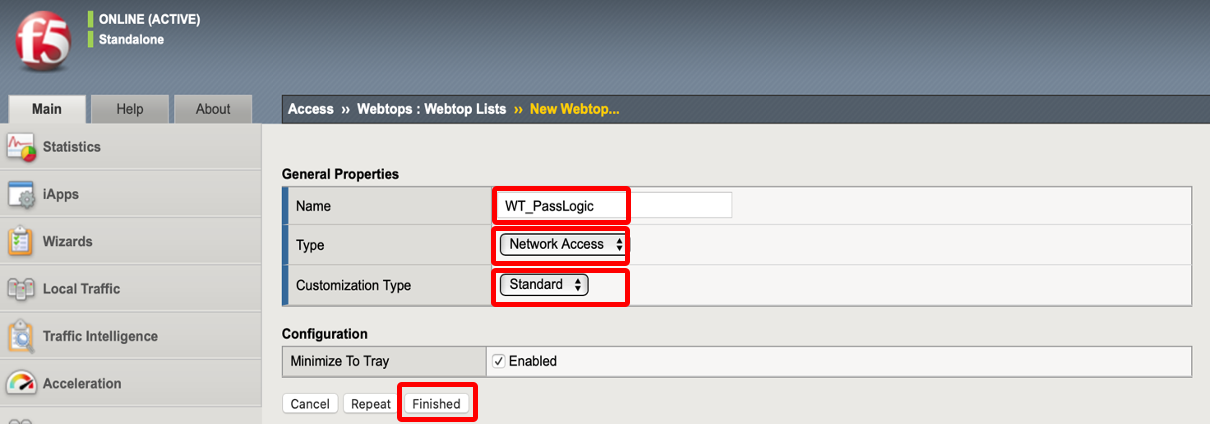
Webtop listを作成します。Access >> Webtops >> Webtop Lists にて、Name にて任意の名称を入力し、Type にて、Network Access を選択し、Customization Type にて Standard を選択し、Finished ボタンを押します。
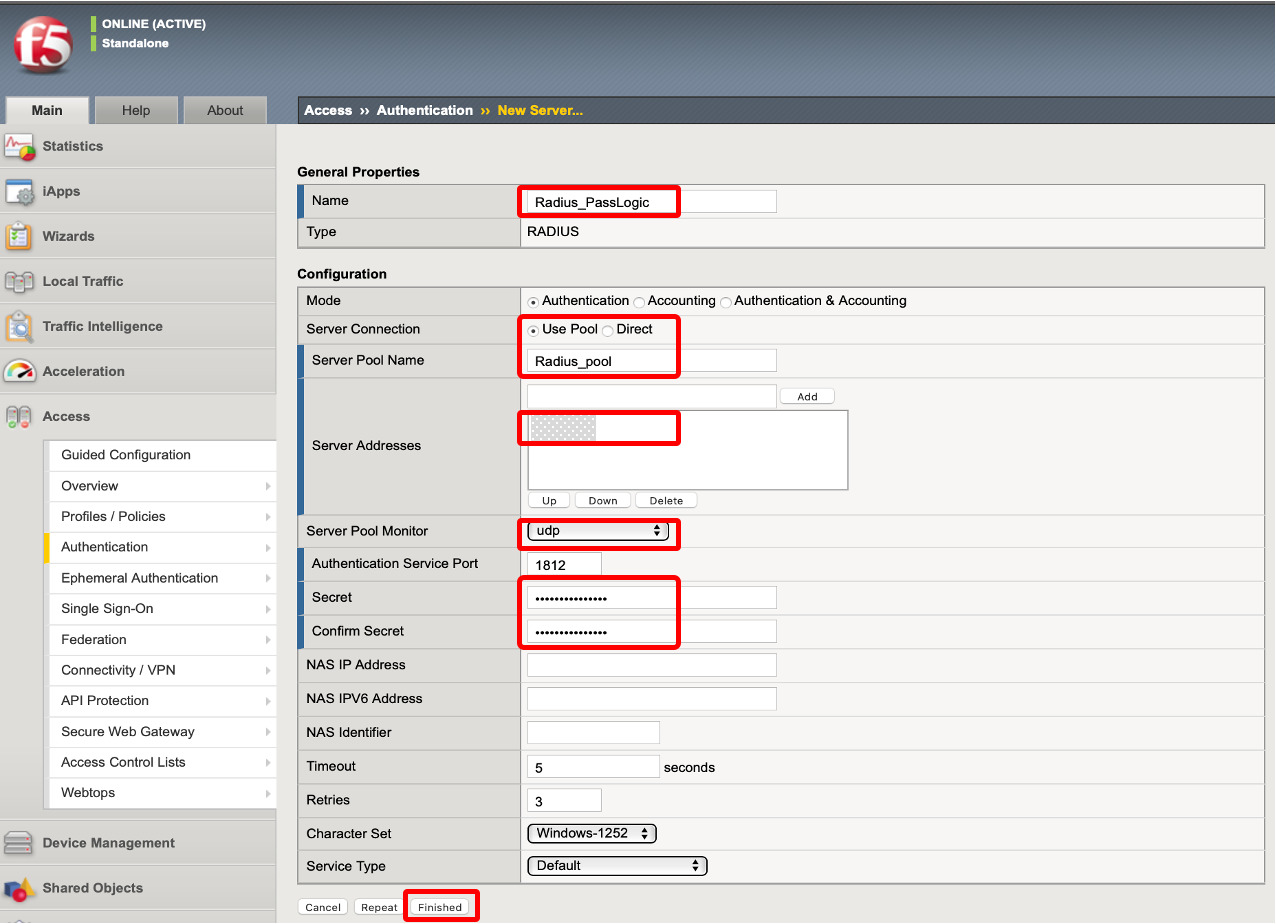
RADIUSプロファイルを作成します。 Access >> Authentication >> RADIUS にて、Create ボタンを押します。Name に任意の名称を入力し、Server Connection にて、User Pool を選択肢し、Server Pool Name に任意の名称を入力し、Server Addresses にて、パスロジ社から割り当てられたRadiusサーバのアドレス、Server Pool Monitor にて udp を選択、Secret にて、PassLogicクラウド申込み時に申請したRadiusシークレットを設定し、Finished ボタンを押します。
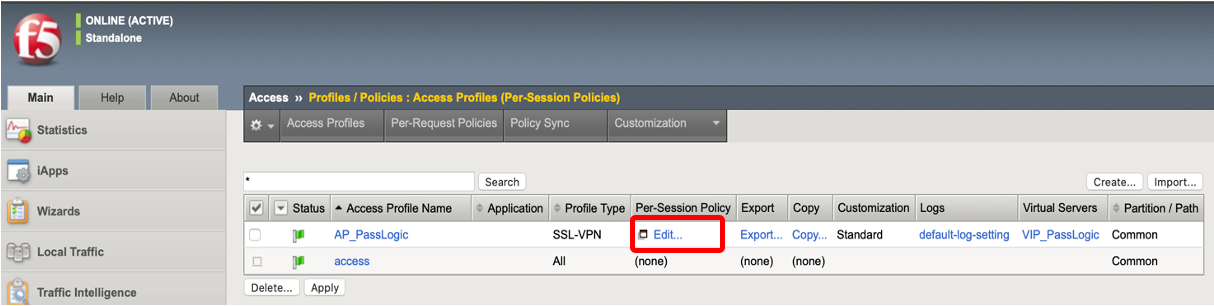
7項で作成した Access Profile の Editリンク を押します。
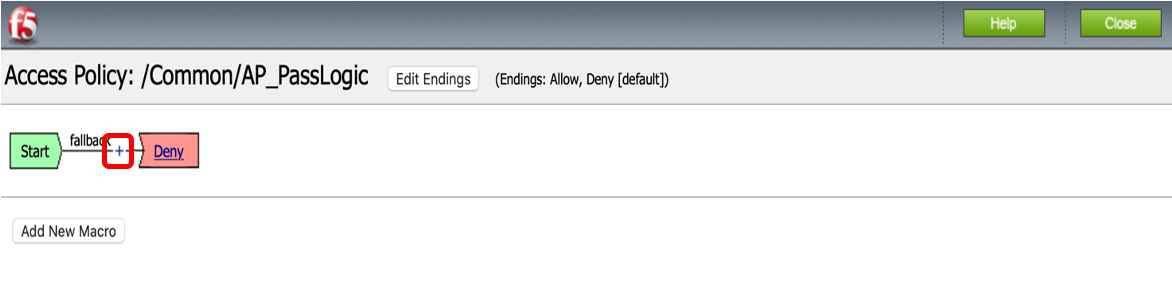
Visual Policy Editorが表示されます。Start と Deny の間の + ボタンを押します。
External Logon Page を選択し、Add Item ボタンを押します。

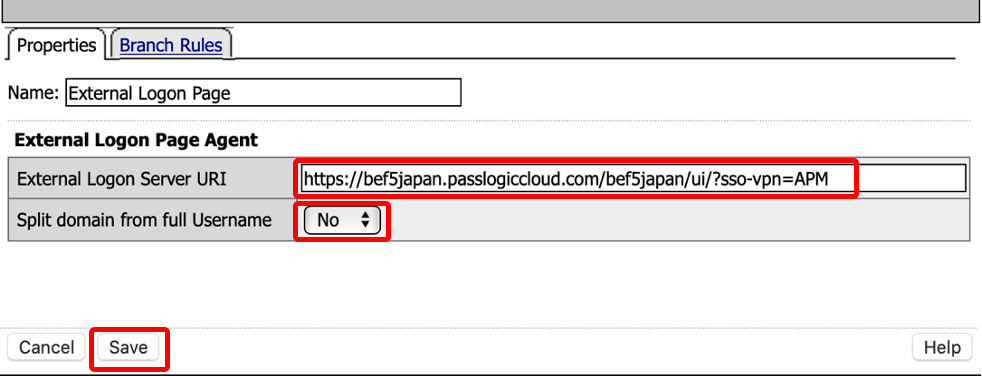
https://<テナント名>.passlogiccloud.com/<テナント名>/ui/?sso-vpn=<アプリ名称> と入力します。アプリ名称には、PassLogicクラウド版のRADIUSで設定したものを利用します。(例:https://bef5japan.passlogiccloud.com/bef5japan/ui/?sso-vpn=APM)また、Split domain from full Username にて、No を選択し、Save ボタンを押します。
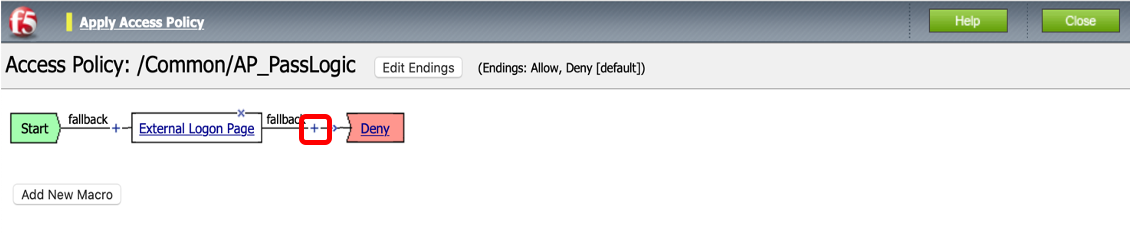
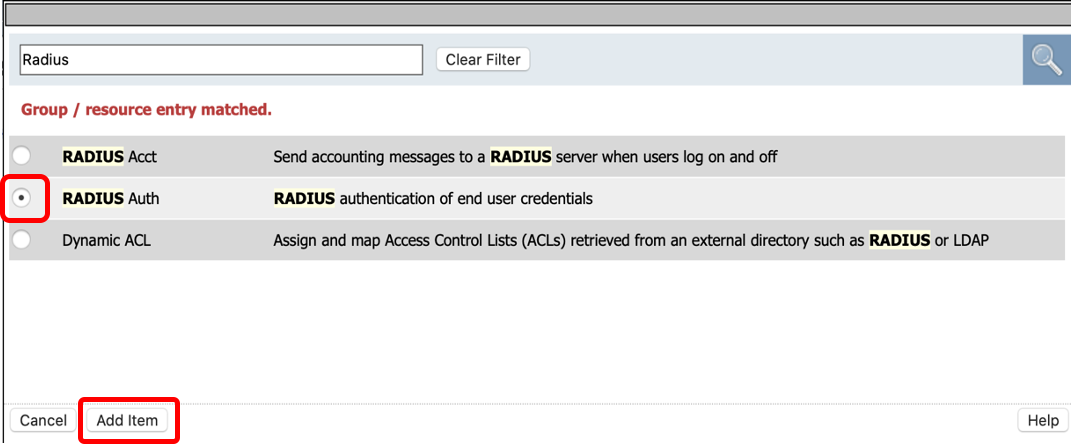
次に、前項で追加した External Logon Page の右側の + ボタンを押します。
RADIUS Auth を選択し、Add Item ボタンを押します。
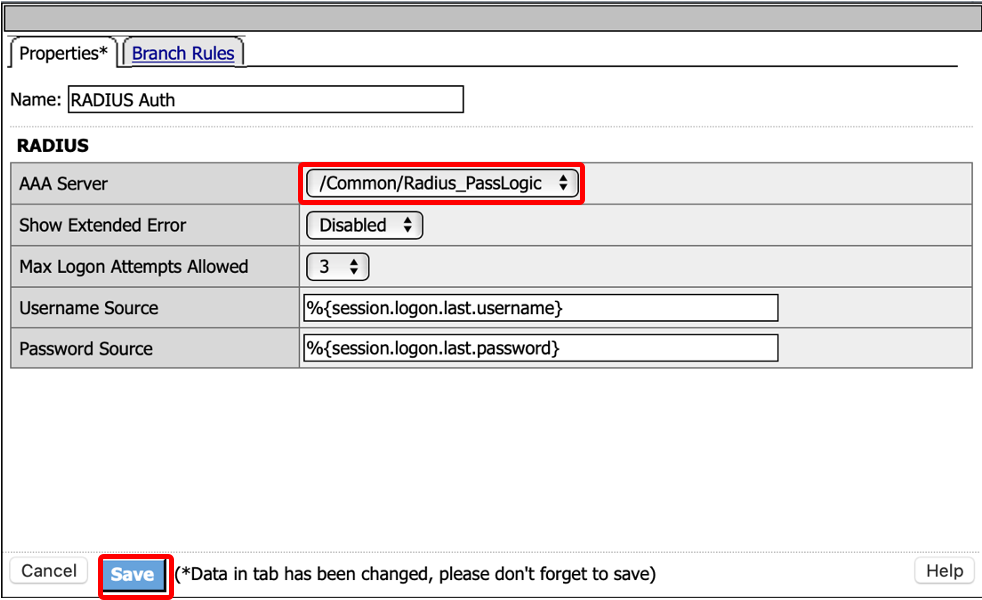
AAA Server に前項までに設定したRadiusサーバの設定を選択し、Save ボタンを押します。
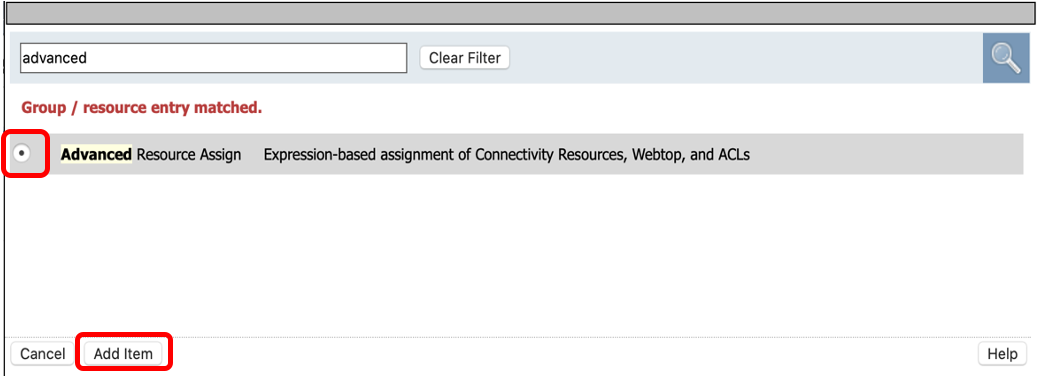
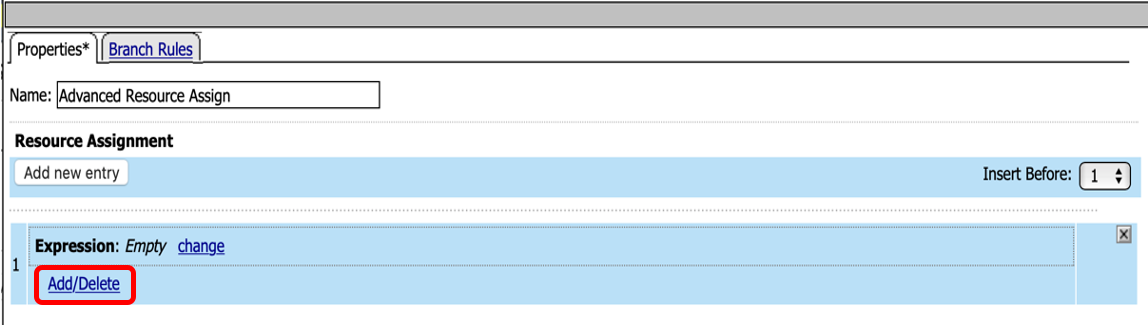
前項で設定した RADIUS AUTH の右側の + ボタンを押し、Advanced Resource Assign を選択し、Add Item ボタンを押します。
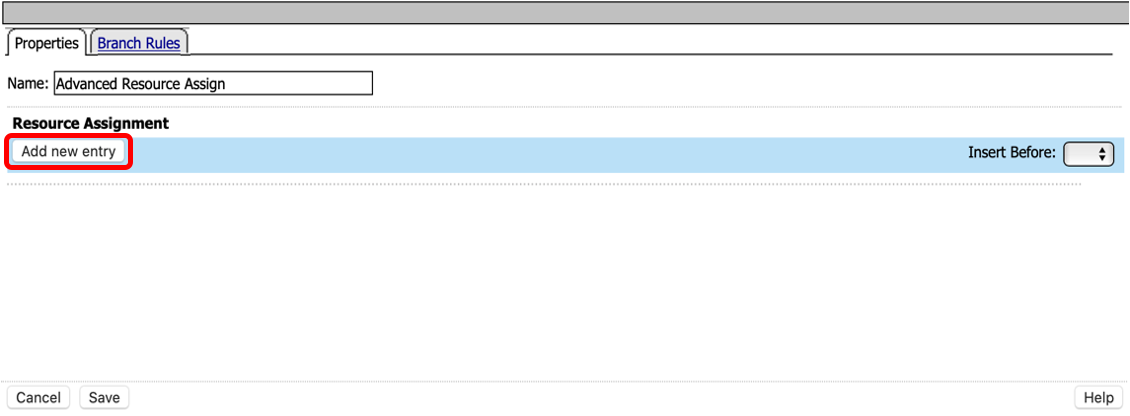
Add new entry を押します。
Add/Delete を押します。
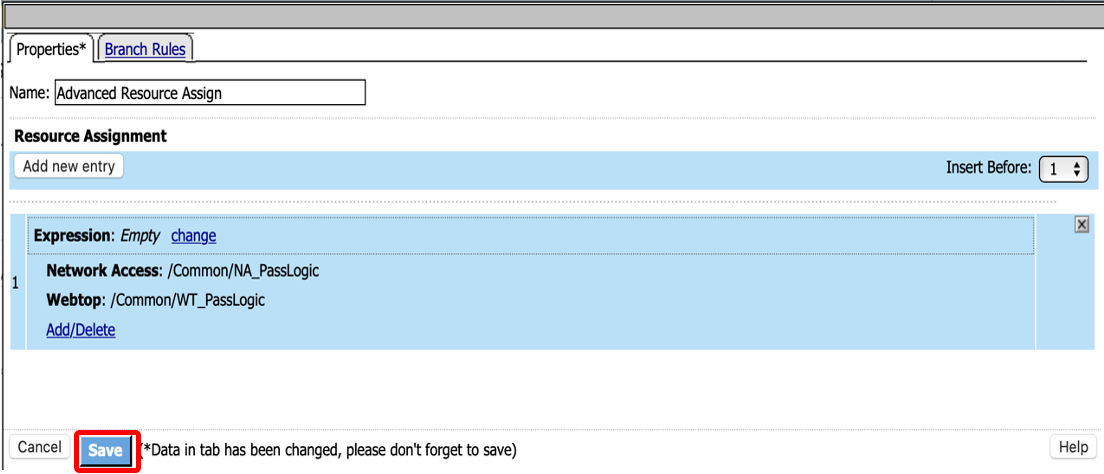
Network Access タブにて、前項までに作成した Network Access List を選択します。

Webtop タブにて、前項までに作成したWebtopを選択し、Update ボタンを押します。

Save ボタンを押します。
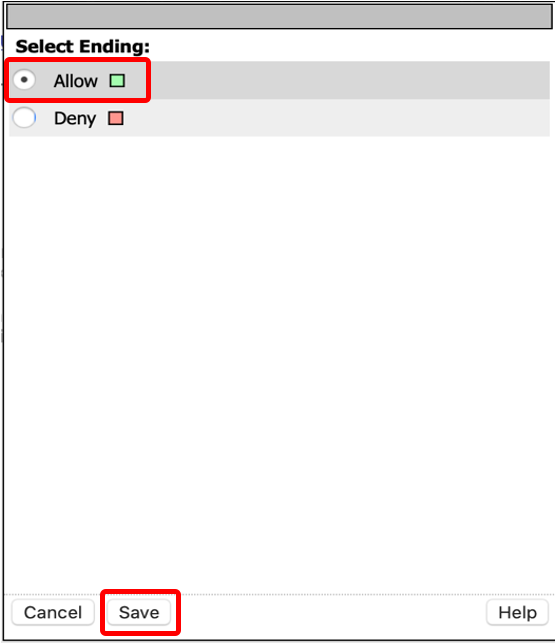
Advanced Resource Assign の先のEnding Boxを Deny から Allow に変更します。
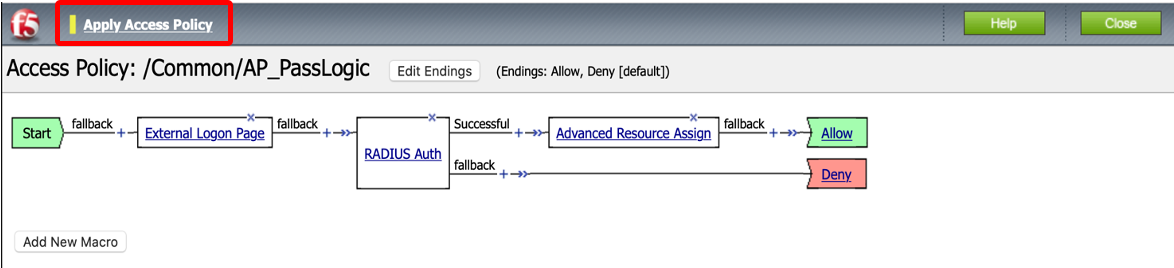
Apply Access Policy を押します。
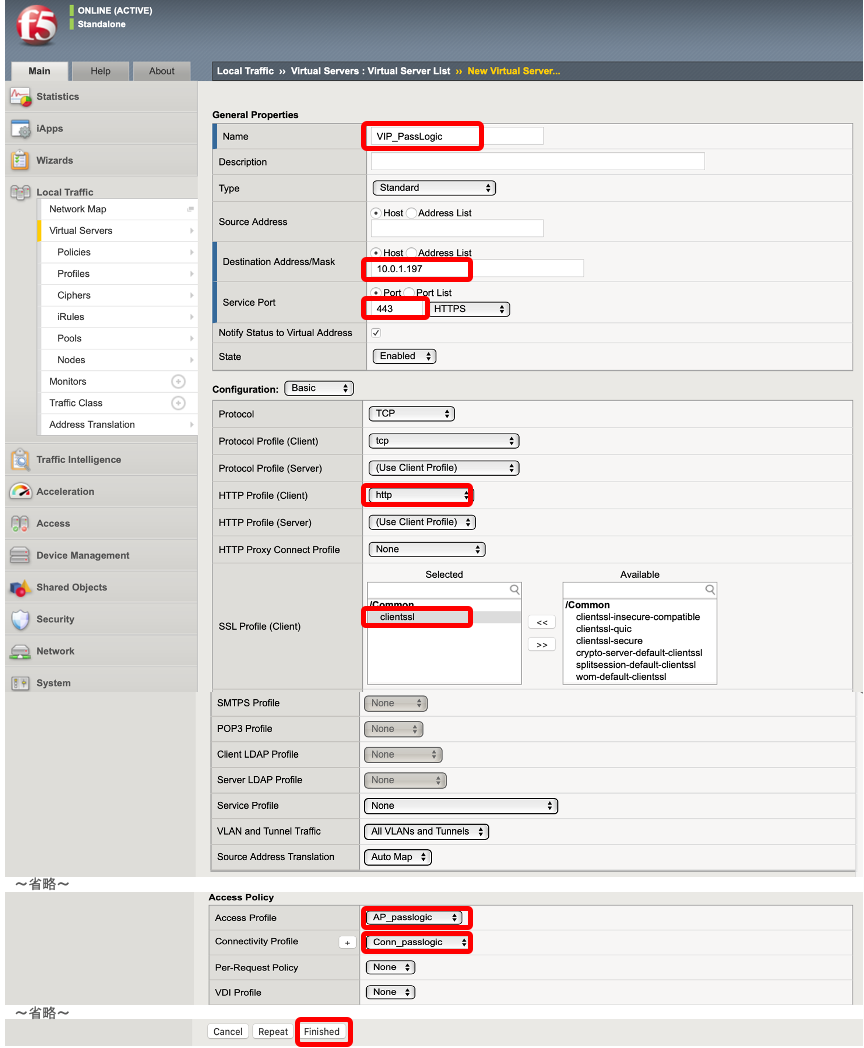
クライアントからアクセスするVirtual Serverを作成します。Local Traffic >> Virtual Servers >> Virtual Server List にて、Create ボタンを押します。Name にて任意の名称を入力し、Destination Address/Mask にてVirtual ServerのIPアドレスを入力し、Server Port にて 443 を入力し、HTTP Profilce(Client) にて http を選択し、SSL Profile(Client) にて、clientssl を選択し、Access Profile にて作成済みのプロファイル、Connectivitiy Profile にて作成済みのプロファイルを選択し、Finished ボタンを押します。